Homelab Adventures: Nested Proxmox on a Budget Laptop
Sometimes, building a homelab is less about having perfect hardware and more about learning to innovate within constraints. By starting with an AUD 75 laptop, we’re proving that you don’t need the latest-and-greatest server gear to master cloud-native and DevOps tools. This post covers how we set up Windows 10 Pro as a base, installed Proxmox in a nested environment, tackled some serious networking hurdles, and laid the groundwork for future Kubernetes, VLAN, and IaC explorations.
Key Principles
- Start small, iterate often. Rapid experimentation leads to quicker learning.
- Use secondhand/affordable gear. Proves you don’t need expensive hardware to explore advanced topics.
- Hands-on troubleshooting over perfection. Real learning comes from fixing things that break.
Day 0: Acquiring Budget Hardware
Action: Bought a Dell Latitude E7240 Ultrabook for AUD 75 via Facebook Marketplace.
Reason: Low-cost entry point for a dedicated homelab—2 cores, 16 GB RAM, and an SSD are enough to run nested virtual machines and experiment with various tools.
Value: Portable, quiet, and inexpensive to run in a home environment, making it ideal for both portability and 24/7 operation.
Hardware Specs Recap:
• Purchase Price: AUD $75
• CPU: Intel Core i7-4600U (2C/4T)
• RAM: 16GB DDR3L
• Storage: 500GB SSD
• Approx. Power Draw: 15W idle, up to 45W under load
Deciding on Base OS & Virtualisation
Chosen OS: Windows 10 Pro
Reason: Familiarity (still run Windows tools), plus Hyper-V integration for quick VM provisioning. Using Windows also enables convenient snapshotting and easy bridging with the rest of the home network.
Alternative Consideration: Bare-metal Proxmox. Ultimately, we decided on Windows 10 first to minimize downtime and keep certain workflows. Proxmox will run as a nested VM inside Hyper-V.
Day 1: Proxmox on a Potato (Nested!)
Action: Installed Proxmox inside Hyper-V.
Reason: Proxmox is a popular hypervisor for homelabs, offering extensive features like clustering, ZFS support, and advanced networking.
Outcome: Ran into tricky network complications related to bridging and NAT in a nested environment.
Identified Network Complications
Problem: Bridging for Proxmox VMs inside Hyper-V can cause connectivity issues—like trouble obtaining IP addresses or exposing services externally. Nested virtualisation often restricts certain kernel-level features and can add complexity to networking.
Decision: Continue with Windows 10 + Hyper-V for now, but refine network config meticulously.
Step-by-Step Setup & Troubleshooting
1. Create the Internal Virtual Switch in Hyper-V
- Open Hyper-V Manager → Virtual Switch Manager → New Virtual Switch.
- Name it:
Proxmox-Lab. - Select Internal.
- Check "Enable virtual LAN identification" if you plan on using VLANs later.
- Click OK.
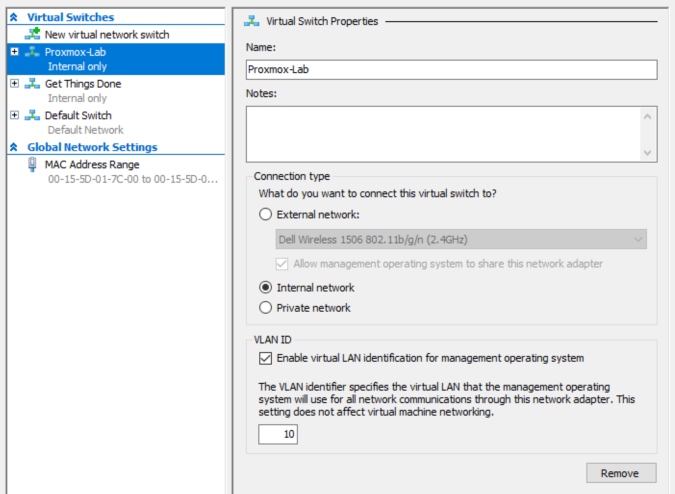
Example Configuration:
Switch Name: Proxmox-Lab
Type: Internal
VLAN ID: Optional (future use)
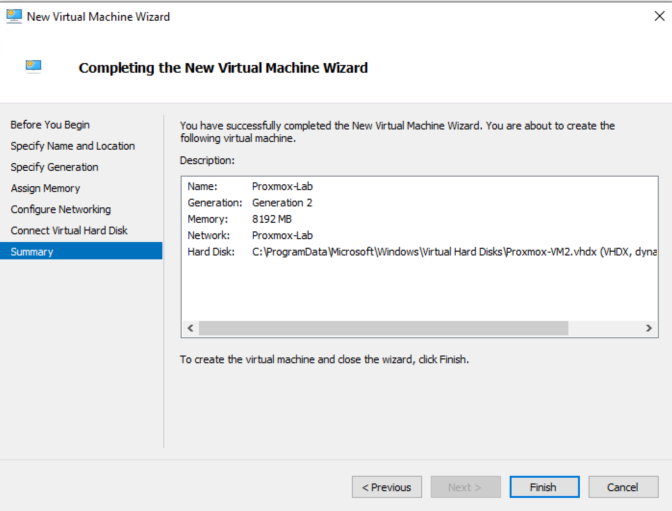
2. Download & Create Proxmox VM in Hyper-V
- Download the Proxmox VE ISO.
- Open Hyper-V Manager.
- Right-click your host → New → Virtual Machine.
- Name: Proxmox-VM (or similar).
- Generation: 2 (required for UEFI support).
- Memory: 8 GB static allocation (dynamic can cause odd issues with nested VMs).
- Network: Select the
Proxmox-Labinternal switch. - Virtual Disk: 128GB (or as large as your SSD can handle).
- Installation Source: Point to the Proxmox ISO.
3. Adjust VM Settings
3.1 Enable Nested Virtualization
# In Administrator PowerShell:
Set-VMProcessor -VMName "Proxmox-VM" -ExposeVirtualizationExtensions $true
If you skip this step, you may encounter errors indicating that Proxmox can’t detect virtualization extensions during installation.
3.2 Allocate More Virtual Processors
Set-VM -VMName "Proxmox-VM" -ProcessorCount 4
Adjust based on your laptop’s CPU core/thread availability.
4. Install Proxmox
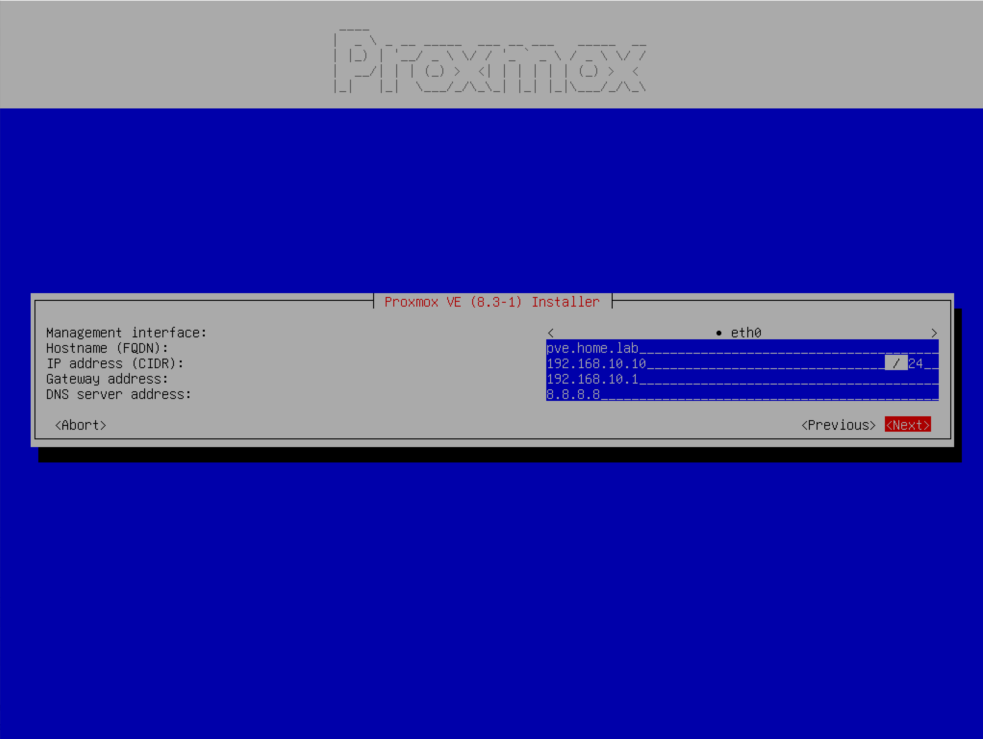
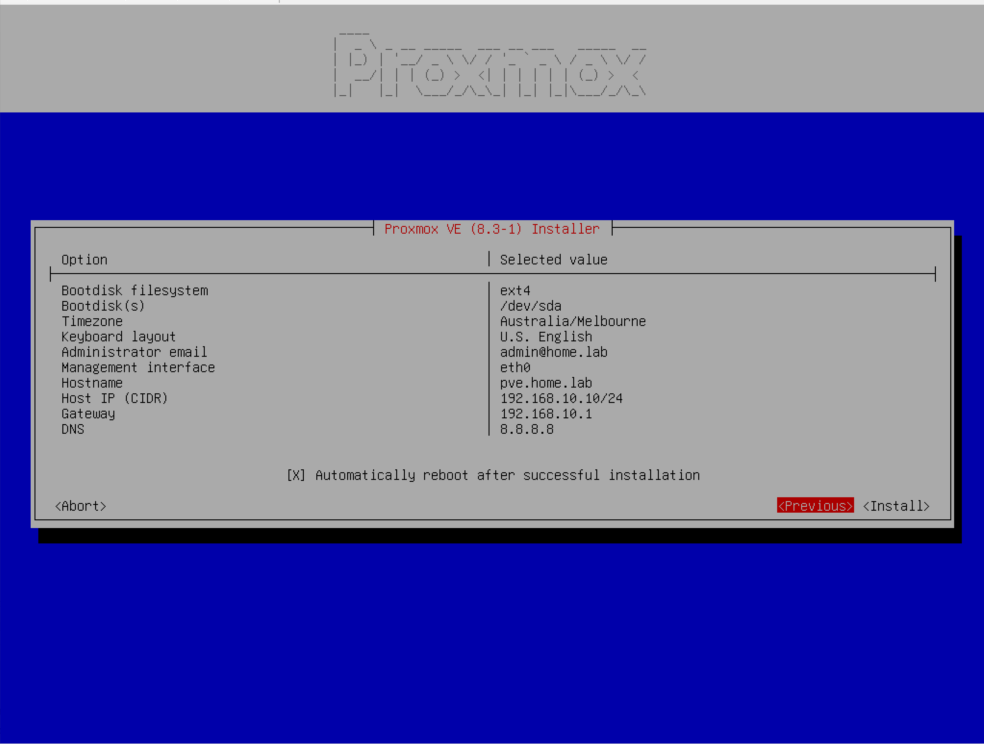
Boot the VM and follow the on-screen instructions. When prompted for network configuration, use the table below.
| Field | Suggested Value | Explanation |
|---|---|---|
| Management Interface | eth0 (default) |
This is the interface connected to the Proxmox-Lab switch in Hyper-V. |
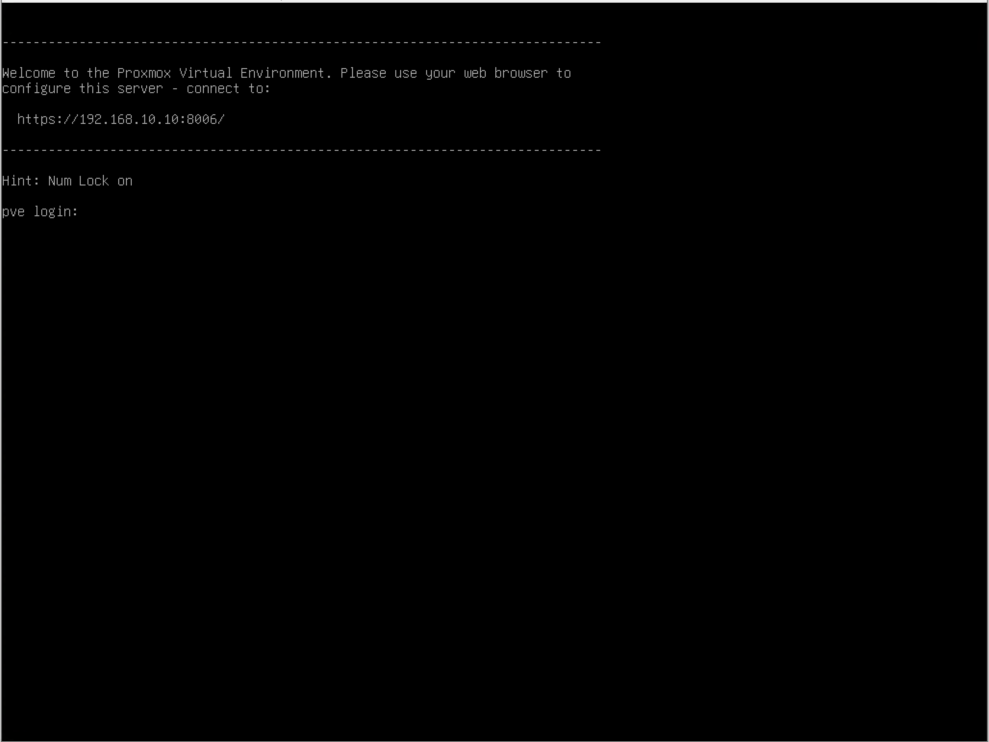
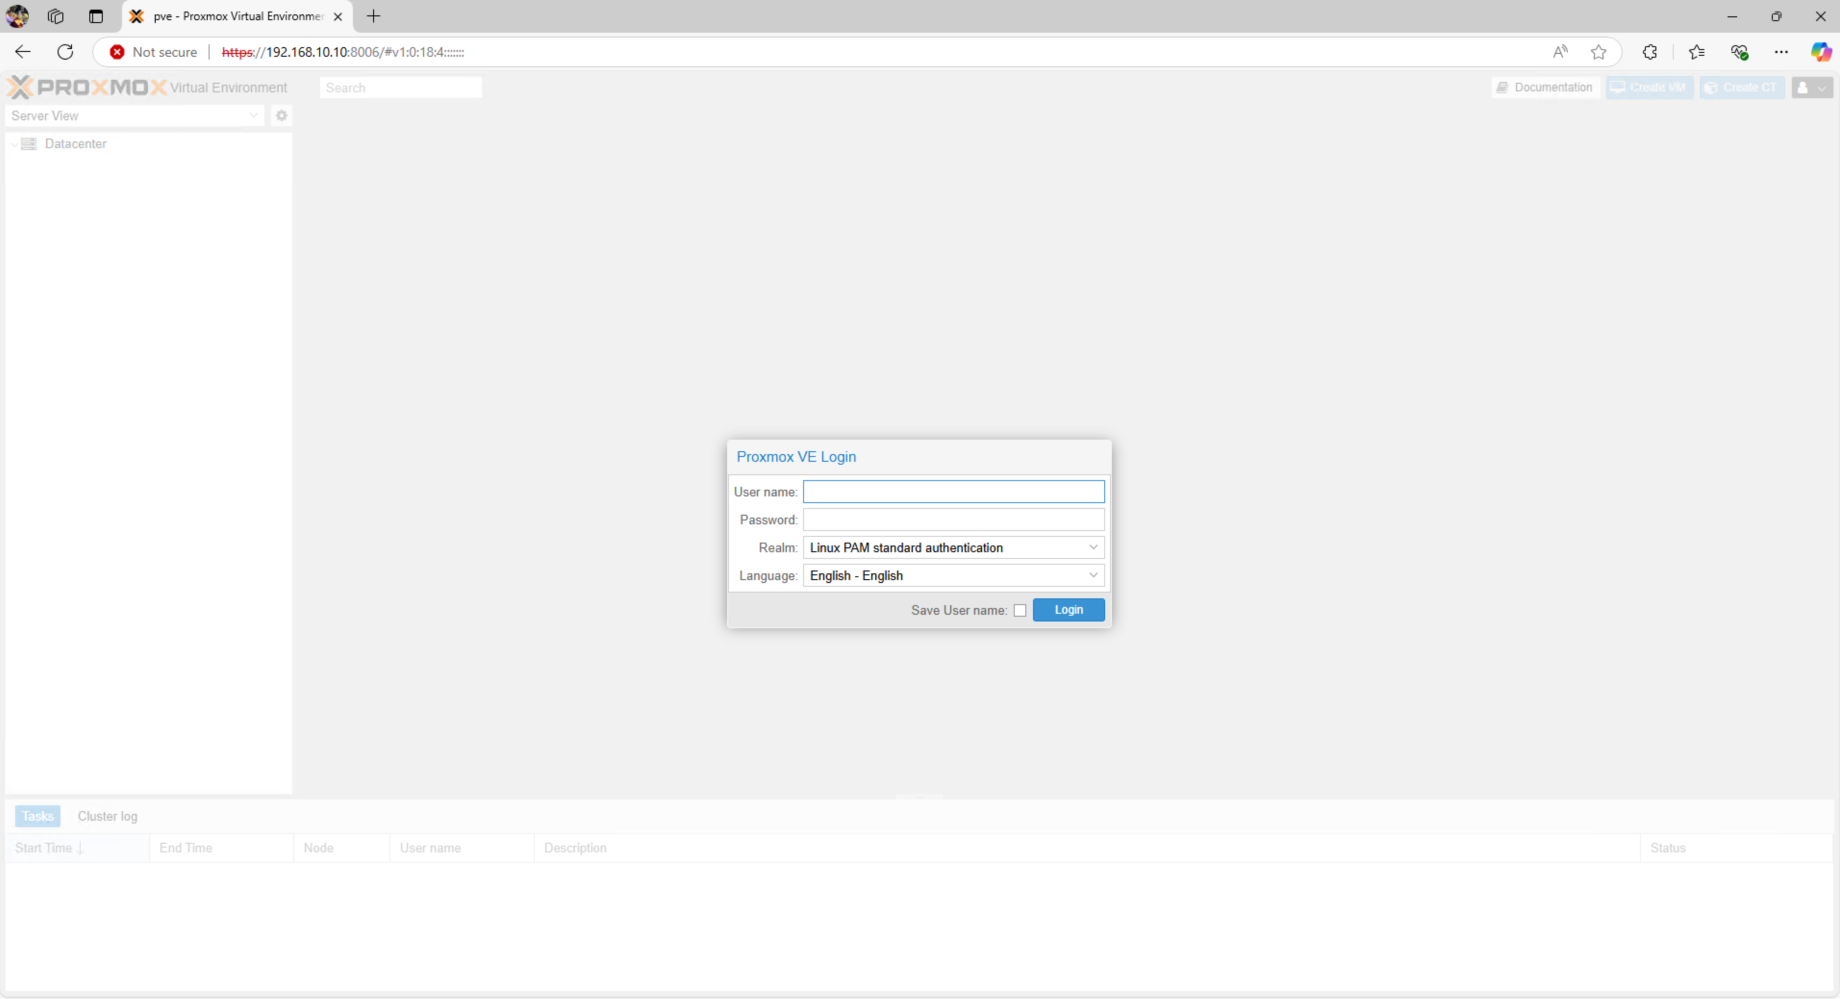
| Hostname (FQDN) | proxmox.lab |
Use a dummy domain like .lab for homelab use. |
| IP Address (CIDR) | 192.168.10.10/24 |
Static IP for Proxmox. We’ll NAT from 192.168.10.0/24. |
| Gateway Address | 192.168.10.1 |
Windows host’s NAT IP—essential for external connectivity. |
| DNS Server | 8.8.8.8 (Google) or 1.1.1.1 (Cloudflare) |
Ensure reliable external DNS for updates, package installs, etc. |
Networking: Detailed Troubleshooting
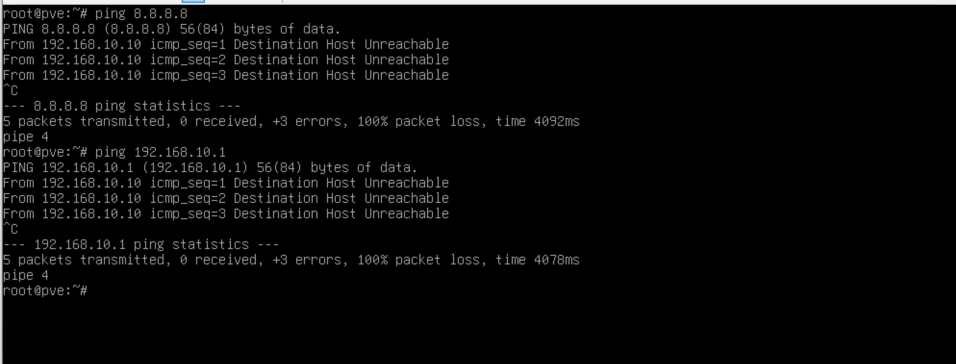
After installation, you might discover that your Proxmox VM can’t access the internet or the local network. Here’s the deep dive on fixing that.
Check /etc/network/interfaces
nano /etc/network/interfaces

# Example Configuration:
auto lo
iface lo inet loopback

auto eth0
iface eth0 inet manual

auto vmbr0
iface vmbr0 inet static
  address 192.168.10.10/24
  gateway 192.168.10.1
  bridge-ports eth0
  bridge-stp off
  bridge-fd 0
  dns-nameservers 8.8.8.8
Verify Proxmox-Lab NAT on Windows Host
# In PowerShell, check if the NAT is set correctly:
Get-NetNat -Name "ProxmoxNAT" | Select InternalIPInterfaceAddressPrefix

# Expected: 192.168.10.0/24
If not configured:
# Remove existing NAT (if any)
Remove-NetNat -Name "ProxmoxNAT" -Confirm:$false -ErrorAction SilentlyContinue

# Create a new NAT rule:
New-NetNat -Name "ProxmoxNAT" -InternalIPInterfaceAddressPrefix "192.168.10.0/24"
Assign Static IP 192.168.10.1 to vEthernet (Proxmox-Lab)
# Remove existing IP (if any)
Remove-NetIPAddress -InterfaceAlias "vEthernet (Proxmox-Lab)" -Confirm:$false

# Assign static IP
New-NetIPAddress -InterfaceAlias "vEthernet (Proxmox-Lab)" -IPAddress 192.168.10.1 -PrefixLength 24
Enable Internet Sharing on the Host
- Open Control Panel → Network Connections.
- Right-click your main Wi-Fi/Ethernet adapter → Properties → Sharing.
- Check "Allow other network users to connect" and select
vEthernet (Proxmox-Lab)from the dropdown. - Restart the Proxmox-Lab adapter:
Restart-NetAdapter -Name "vEthernet (Proxmox-Lab)"
Firewall & DNS Checks
- Enable ICMP inbound:
New-NetFirewallRule -DisplayName "Allow ICMPv4" -Direction Inbound -Protocol ICMPv4 -IcmpType 8 -Action Allow - Edit DNS settings in Proxmox:
nano /etc/resolv.conf # Add or confirm: nameserver 8.8.8.8 nameserver 1.1.1.1 - Open Proxmox Web UI port:
New-NetFirewallRule -DisplayName "Proxmox Web UI" -Direction Inbound -LocalPort 8006 -Protocol TCP -Action Allow
Now, ping 192.168.10.1 and ping 8.8.8.8 from the Proxmox VM. If both work, you’re in business!

Final Network Configuration Summary
| Component | Configuration |
|---|---|
| Hyper-V Switch (Proxmox-Lab) | Static IP on host side: 192.168.10.1/24 |
| Proxmox Host | Static IP: 192.168.10.10/24, Gateway: 192.168.10.1 |
| NAT Subnet | 192.168.10.0/24 |
Why Enable VLAN ID on the Hyper-V Switch?
Even if you don’t need VLANs right now, enabling VLAN ID will help you practice advanced networking scenarios in the future:
- DirectConnect Emulation: Simulate AWS/Azure DirectConnect (private VLANs over dedicated lines).
- QinQ (802.1ad): Experiment with VLAN stacking for carrier-grade network scenarios.
- Multi-Tenant Labs: Isolate different Kubernetes clusters or DevOps tools in separate VLANs.
# Applying VLAN ID to a Hyper-V VM
Set-VMNetworkAdapterVlan -VMName "Proxmox-VM" -Access -VlanId 10

# In Proxmox, ensure:
bridge-vlan-aware yes
bridge-vids 2-4094
Next Steps: Kubernetes, IaC, & VLAN Experiments
With our nested Proxmox environment running on a humble Dell Latitude, we now have a flexible setup for more advanced projects:
- Kubernetes Deployment: Spin up a small cluster in Proxmox VMs, explore a CNI (e.g., Calico or Flannel), and delve into Pod networking in a nested lab.
- Infrastructure as Code (IaC): Use tools like Terraform and Ansible to automate provisioning and configuration. This is an excellent next step to refine your DevOps skillset.
- Deep VLAN Config: Separate labs or apps on different VLANs to practice more advanced networking and micro-segmentation.
There’s still plenty to learn, and the entire networking arena can get overwhelming. Take it one step at a time, and remember the principle: fail fast, learn relentlessly.
Do you have any Cloud Native projects in mind that you’d like to see tested on this potato-laptop lab? Feel free to share your ideas—whether it’s ephemeral Kubernetes clusters, custom CI/CD pipelines, or specific open-source platforms. Let’s explore them together!
Conclusion
This nested Proxmox homelab might not be perfect, but it’s a testament to how resourceful we can be with secondhand gear and open-source software. By embracing occasional headaches—like NAT bridging and VLAN confusion—we grow stronger in our sysadmin and DevOps skills. The journey’s only begun. Next up, let’s tackle Kubernetes, get serious with IaC, and eventually master VLANs. Keep building, keep exploring, and keep learning!